roadbook setup
Building a Digital Roadbook Navigation Setup
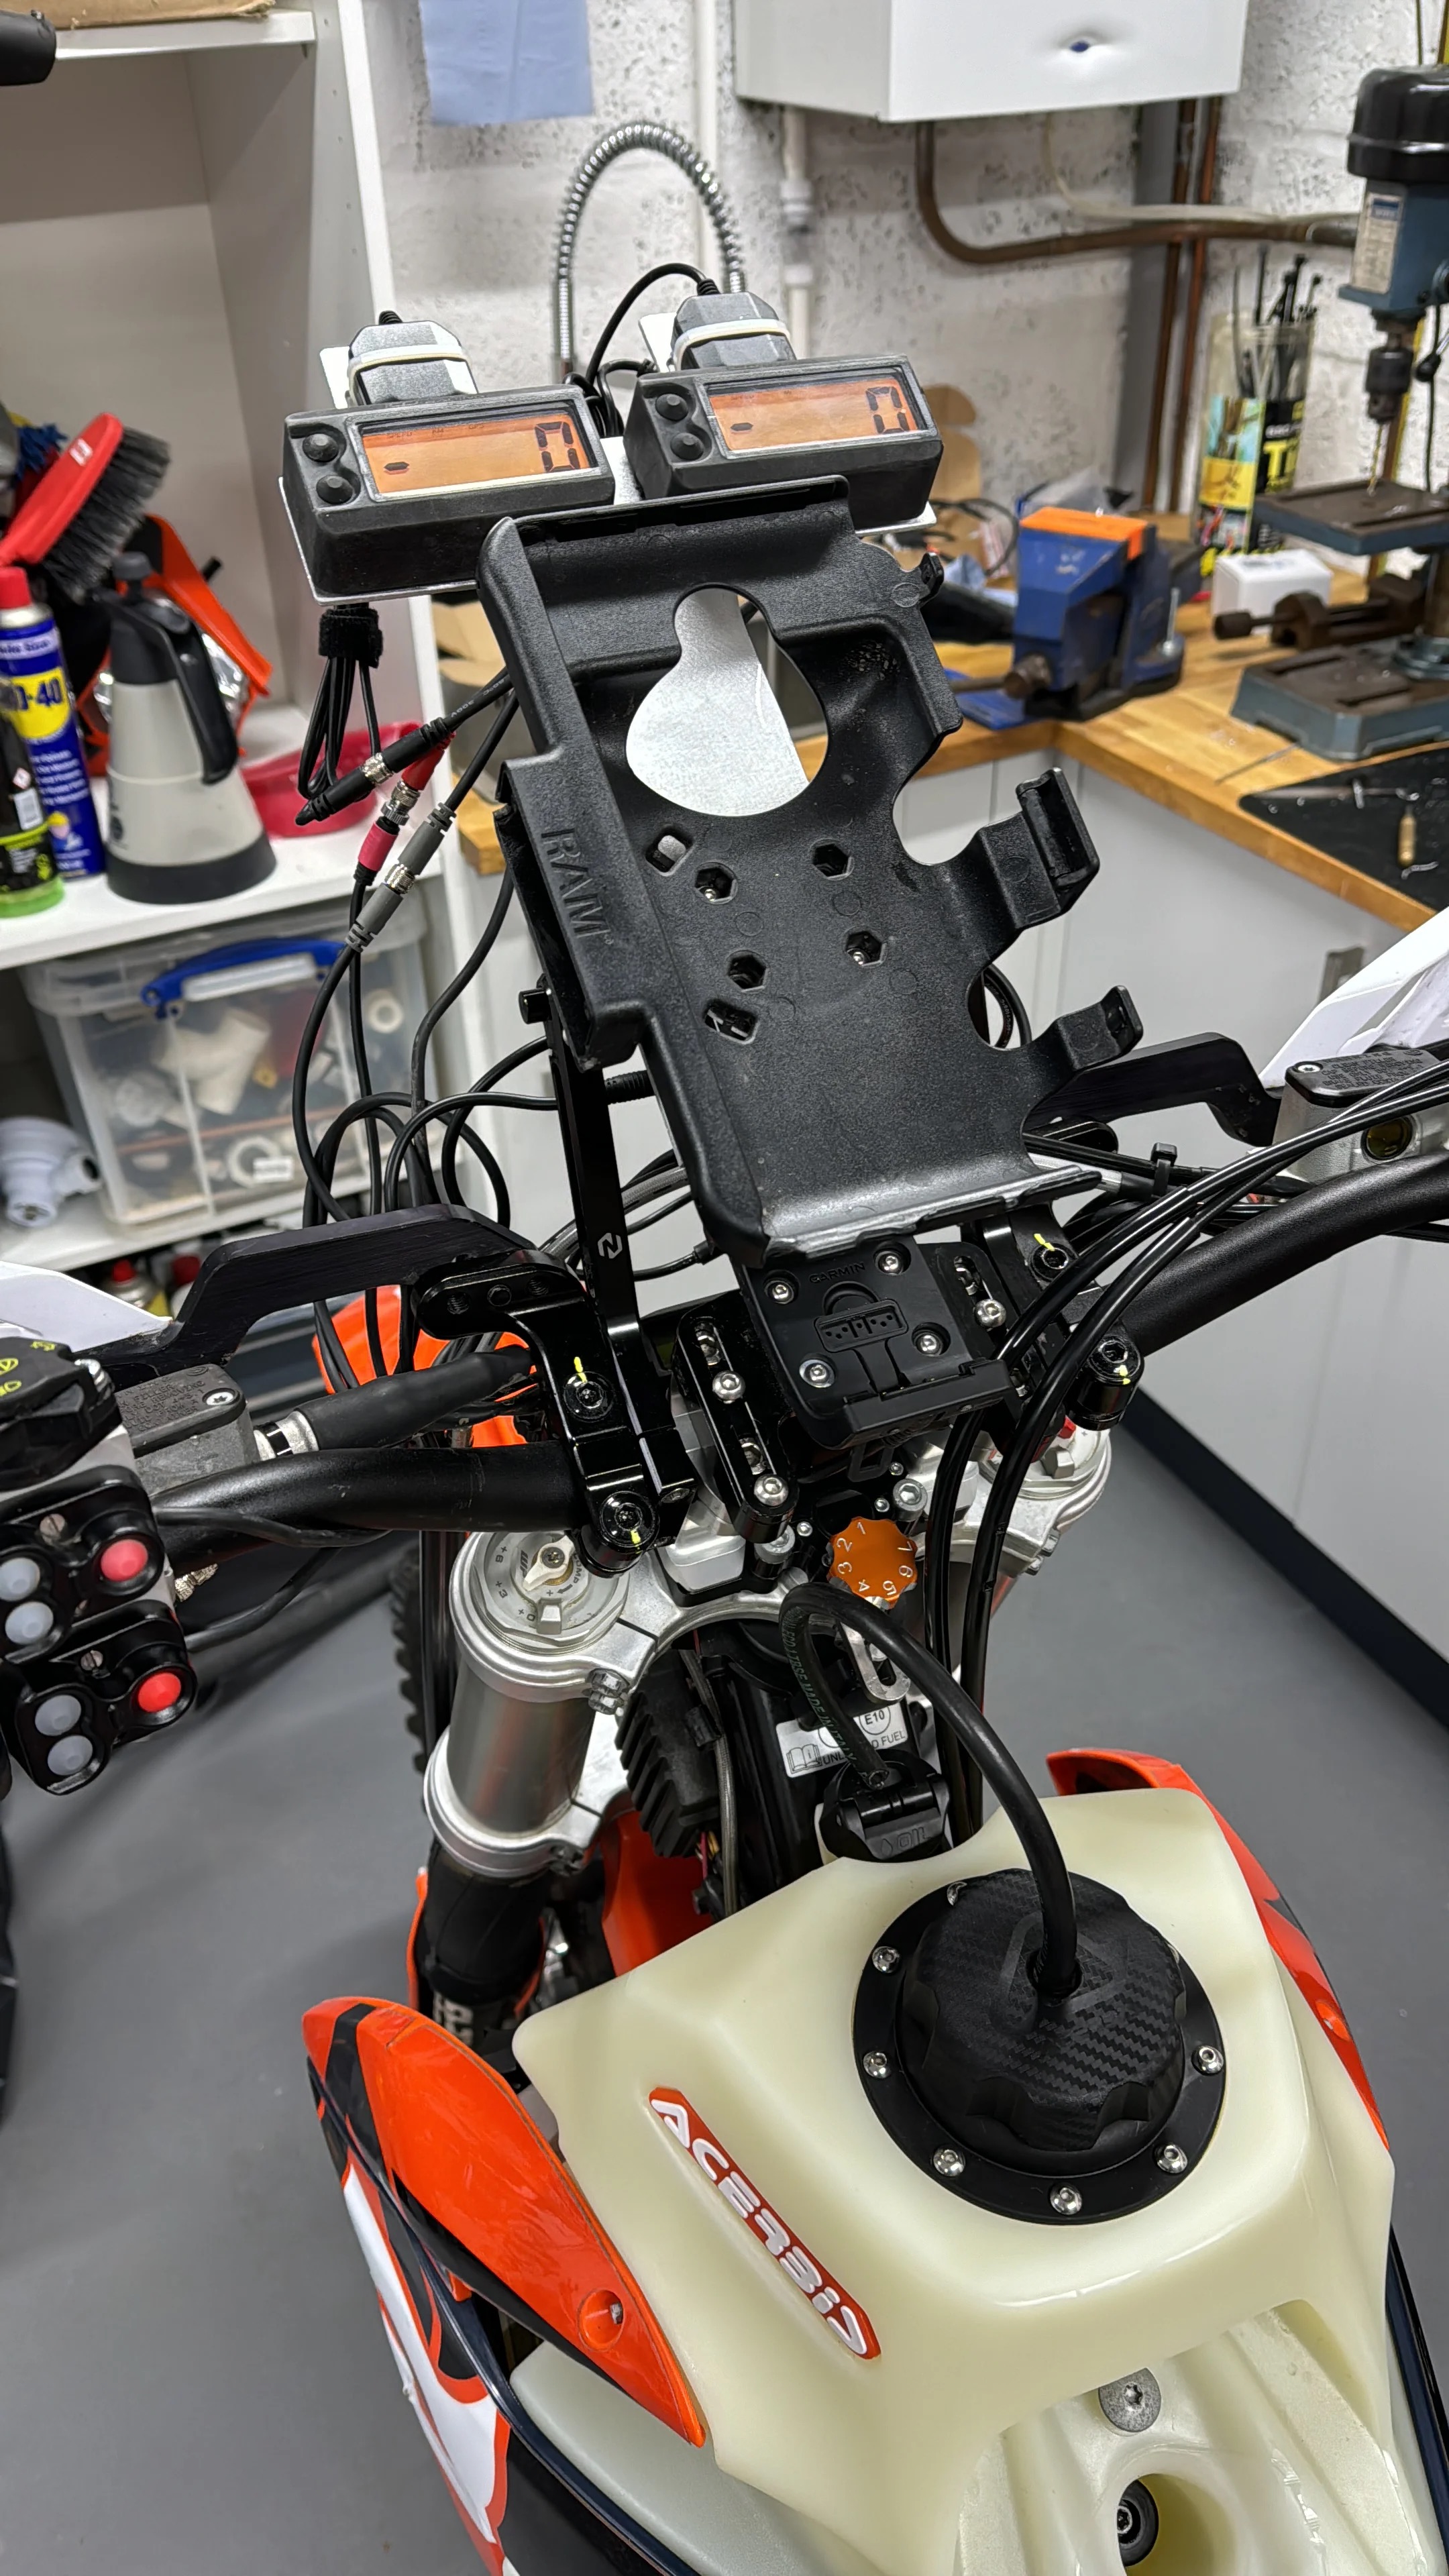
A dependable digital roadbook setup does not need to begin with a rally tower or an expensive dedicated tablet. For most riders, the essentials are an Android phone or tablet, a secure mount, reliable power and controls that can be used without taking a hand off the bars.
This guide explains what matters before you buy equipment and how to build the setup in sensible stages.
What you need for digital roadbook navigation
| Component | Essential? | What to prioritise |
|---|---|---|
| Android phone or tablet | Yes | A readable screen, dependable GPS and enough battery life |
| Secure mount | Yes | Correct fit, low vibration and a position that does not hide the instruments |
| Power supply | Recommended | Weather-resistant wiring and enough output for continuous screen use |
| Handlebar remote | Optional | Controls you can identify by feel while wearing gloves |
| Dedicated navigation tower | Optional | Protection and a stable viewing position for frequent rally use |
Start with the first two items. Add power and a remote once you know you enjoy roadbook riding and understand what your bike needs.
Choosing a phone or tablet
TRBP Navigator runs on Android. A phone is enough to begin, while a larger tablet can make tulips, distances and notes easier to read at a glance.
Before choosing a device, consider:
- Screen visibility: test it outdoors rather than judging it in a shop.
- Screen size: larger is easier to read, but it also needs a stronger mount and more cockpit space.
- Weather resistance: rain, dust and wet gloves are normal riding conditions.
- Charging: check that the charging port remains accessible once mounted.
- Glove use: a handlebar controller can reduce the need to touch the screen.
- Offline preparation: load and check the roadbook before leaving reliable mobile coverage.
Rugged Android devices are popular because they are designed for harder use, but an existing Android phone can be the cheapest way to test the format.
Mounting the device safely
The device should sit where it is easy to glance at without blocking the bike's instruments or restricting steering. Turn the bars fully in both directions and check that the mount, cable and device do not touch the tank, screen or controls.
A good mount should:
- match the exact device dimensions
- resist vibration on rough surfaces
- prevent accidental release
- allow a useful viewing angle when seated and standing
- leave enough space for charging and controller cables
After fitting it, test the setup on a short familiar ride before relying on it for a full roadbook.
Supplying reliable power
Navigation keeps the screen, GPS and processor active, so battery use is much higher than it is with a phone in your pocket. A permanent or ignition-switched power supply is worth considering for longer routes.
Use a suitable fused supply and route the cable so it cannot be pulled tight at full steering lock, trapped by the seat or damaged by heat. Protect exposed connections from water and vibration. If you are not confident working on motorcycle electrics, have the installation checked by someone who is.
Carry enough battery reserve to finish safely if the bike supply fails.
Adding handlebar controls
A compatible Bluetooth or wired controller lets you scroll the roadbook and adjust trip distance from the handlebars. It is not required for a first ride, but it becomes valuable when riding in gloves, standing on the pegs or using the app for rally practice.
Choose controls that:
- are easy to identify without looking down
- fit beside the existing switchgear
- work with your gloves
- tolerate the weather and terrain you ride in
- provide the roadbook and trip-adjustment actions you need
Read the Bluetooth roadbook remote guide before choosing a layout. Riders using DMD-compatible hardware can also see how DMD2 controllers work with TRBP.
Three sensible setup levels
Starter setup
- Existing Android phone
- Secure phone mount
- Battery pack or bike USB supply
- Touchscreen controls
This is enough to discover whether roadbook navigation suits you.
Regular practice setup
- Rugged phone or Android tablet
- Device-specific mount
- Permanent bike power
- Compatible handlebar remote
This suits riders regularly using TRBP roadbook routes for navigation practice.
Event-focused setup
- Bright rugged tablet or dedicated Android navigation device
- Protected cockpit or tower mounting
- Ignition-switched power with tidy weather-resistant wiring
- Wired or proven Bluetooth controller
- Tested backup plan
An event-focused setup should be proven over several practice rides before the start line.
Pre-ride setup checklist
Before every roadbook ride:
- Load the correct roadbook and confirm the start location.
- Check the device is securely locked into the mount.
- Test charging with the engine running.
- Test scroll forward, scroll back and trip adjustment.
- Set screen brightness and disable unwanted notifications.
- Check the cable at full steering lock.
- Carry a safe way to recover if the device or mount fails.
Common mistakes
Buying every component immediately
Start with a device and mount. One or two practice rides will teach you more about screen position and control layout than a shopping list will.
Choosing a mount only for road use
A mount that feels secure in the garage may move or vibrate off-road. Test it progressively.
Depending on touch controls with winter gloves
Test the actual gloves you ride in. If screen use is unreliable, add a compatible remote.
Fitting power without checking steering movement
Always turn the bars fully after routing cables. Leave enough controlled slack without creating a loop that can catch.
What should you buy first?
Use the Android device you already own, buy a mount you trust and complete a short roadbook. Then decide whether screen size, charging or handlebar control is the next limitation.
Once the setup is ready, browse TRBP roadbooks or get the TRBP Navigator app and test everything on a familiar, manageable route.